Business rules are crucial in streamlining processes and automating tasks within Dynamics 365. They effortlessly handle things like setting default values for fields, adjusting one field based on another, toggling field visibility, and even locking or unlocking fields as needed. These rules work behind the scenes, making processes smoother and more efficient without requiring constant manual intervention.
Various components in Business rules are used to perform various tasks, below is an example of the “Set Field Value” component which is used to automatically set the Gender field value in a form based on the user-selected prefix; if the prefix is "Ms", “Miss” or "Mrs," set the Gender to Female; otherwise, set it to Male.
Begin by navigating to the form where you want to implement the Business Rule. Click on the 'Business Rule' icon and click on the 'New Business Rule' button.
After initiating the Business Rule, simply click the down arrow to enter a name for it. This straightforward step allows you to give a meaningful and descriptive name to your Business Rule, aiding in easy identification and management within Dynamics 365.
Click on the ‘Condition’ box to get the properties for setting if conditions in the business rule, enter an appropriate Display Name, Choose the field "Prefix," set the operator to "equals," and specify the field value as "Ms/Mrs/Miss" to create a condition that checks if the Prefix is "Ms" or "Mrs" or “Miss.”
Navigate to 'Components,' access the Actions section, drag and drop the 'Set Field Value' block near the 'if' condition, and execute the action as needed. This action takes place when the 'if' condition evaluates to true.
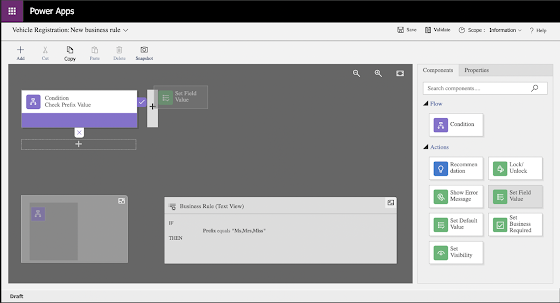
After dragging the 'Set Field Value' block, set the display name for the action, choose the 'Gender' field, set its value to 'Female,' and click 'Apply' to observe the applied changes.
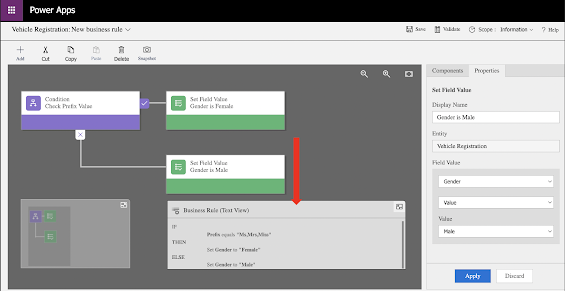
Select another 'Set Field Value' block, drag it below the 'if' condition, set a 'Display Name' for the action, and configure the 'Gender' field value as 'Male' and click 'Apply' to observe the applied changes. This action is executed when the 'if' condition is false.
The Business Rule in Text view is automatically updated, aiding users in comprehending the logic effortlessly.
Click ‘Save’, ‘Validate’, and ‘Activate’ to activate the Business Rule. The form in which the Business Rule is written needs to be saved and published when the business rule is activated for the 1st time to see the changes.
Refresh the screen to check the results. Here are the outcomes after automatically setting the 'Gender' field value using the business rule.
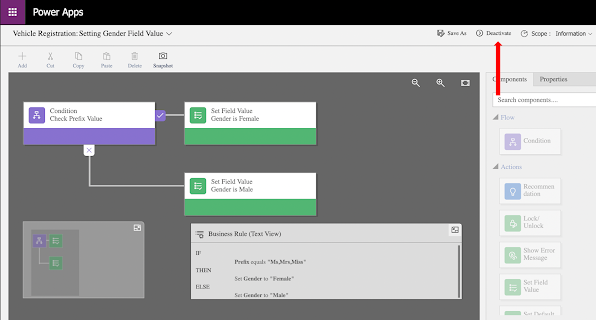
If you need to make more changes to a Business Rule after activating it, simply click on the "Deactivate" button. This will temporarily pause the rule, allowing you to make any necessary adjustments. Once you're done, you can reactivate the rule to put your changes into effect.





Comments
Post a Comment