Adding a Command Bar Button with JavaScript Integration using Power Apps
This guide will demonstrate how to add a custom command bar button called "Renewal Subscription" to the "Subscription" entity in Power Apps. This button will trigger a JavaScript function to update the renewal date of a subscription and display a pop-up notification about the renewal status. Follow these steps:
1. Open the Power Apps App
Navigate to the Power Apps home page.
Go to Apps and select the app where you need to make the changes. In this example, the app is "Sales Trail".

2. Locate the Target Entity
Search for the entity where you want to add the custom button. For this example, search for and select the Subscription entity.

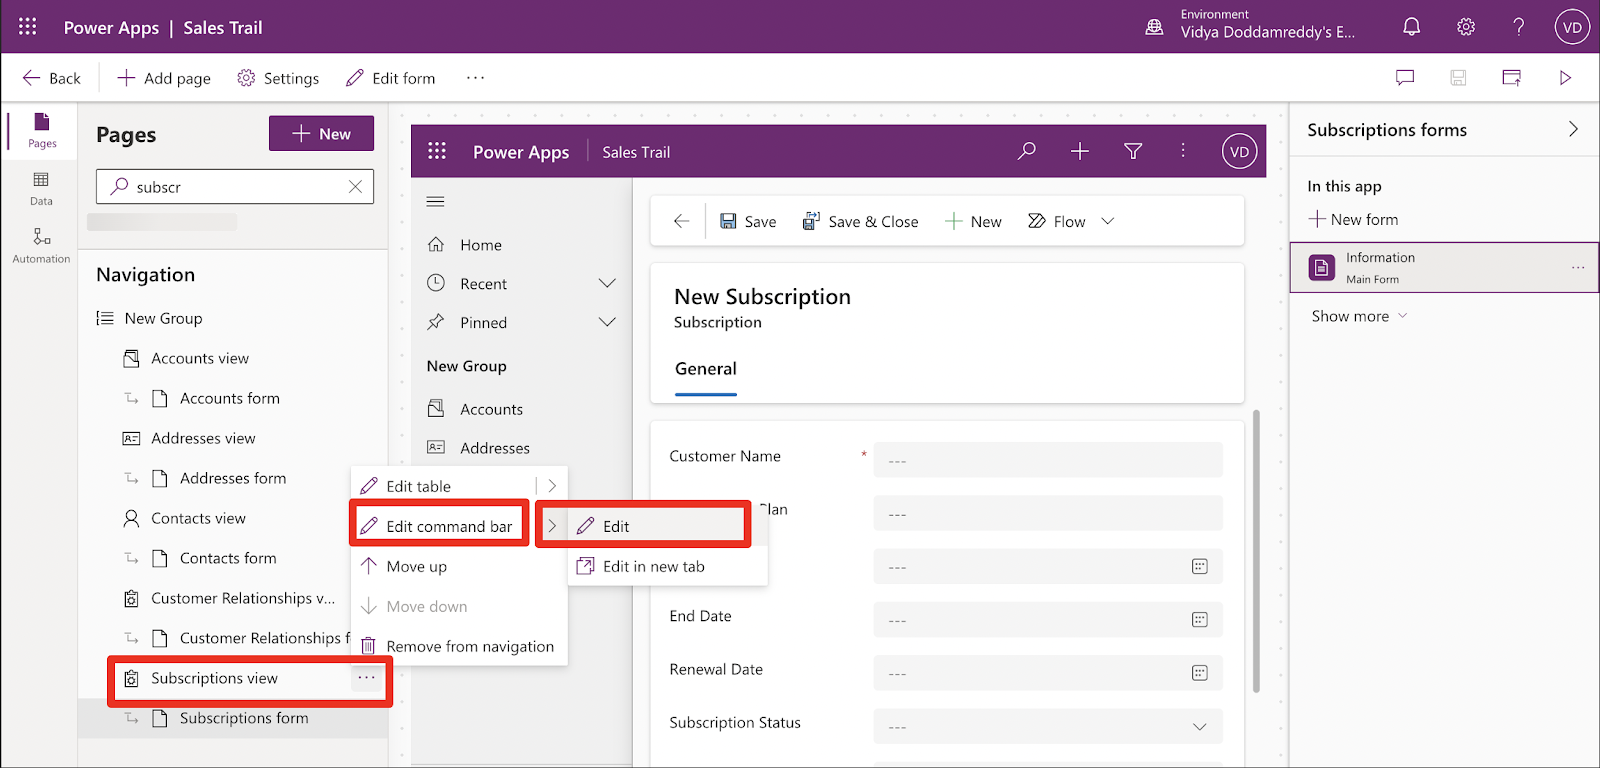
3. Access the Command Bar Editor
Click on the three dots (...) next to the entity name to open options.
Select Edit Command Bar, then click on Edit.
4. Choose the Main Form
In the Command Bar Editor, select Main Form (since the custom button needs to be added inside the form).
Click Edit to proceed.

5. Create a New Command Button
In the editor, click New and select Command to create a new button.
Configure the following for the button:
Label: Enter the name of the button (e.g., "Renewal Subscription"). This name will appear on the form.
Icon: (Optional) Add an icon to represent the button visually.
Action: Choose Run JavaScript as the button’s action.
Click Add Library to link a JavaScript file.


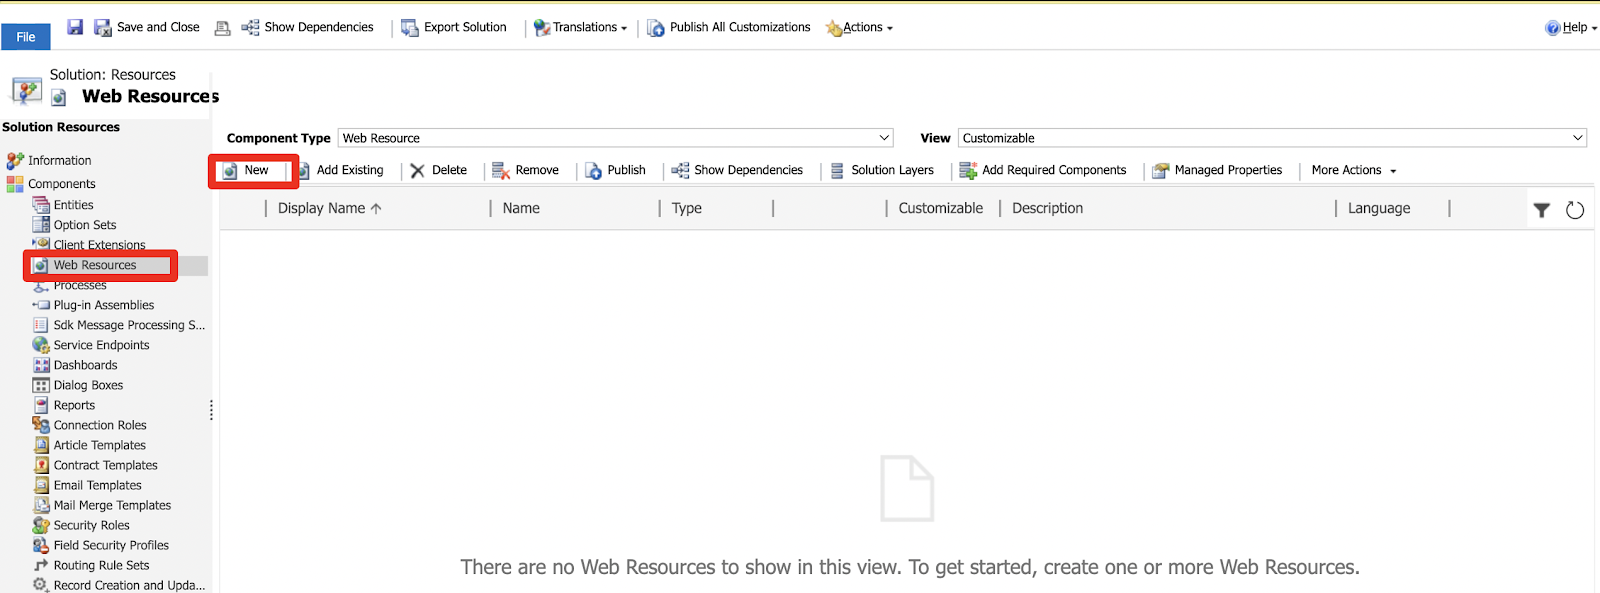
6. Add a New Web Resource
Click New Web Resource to add the JavaScript code.
If adding a JS file, ensure the file has a .js extension.
Add a name to the web resource (e.g., "SubscriptionRenewal.js") and a display name for easy identification.
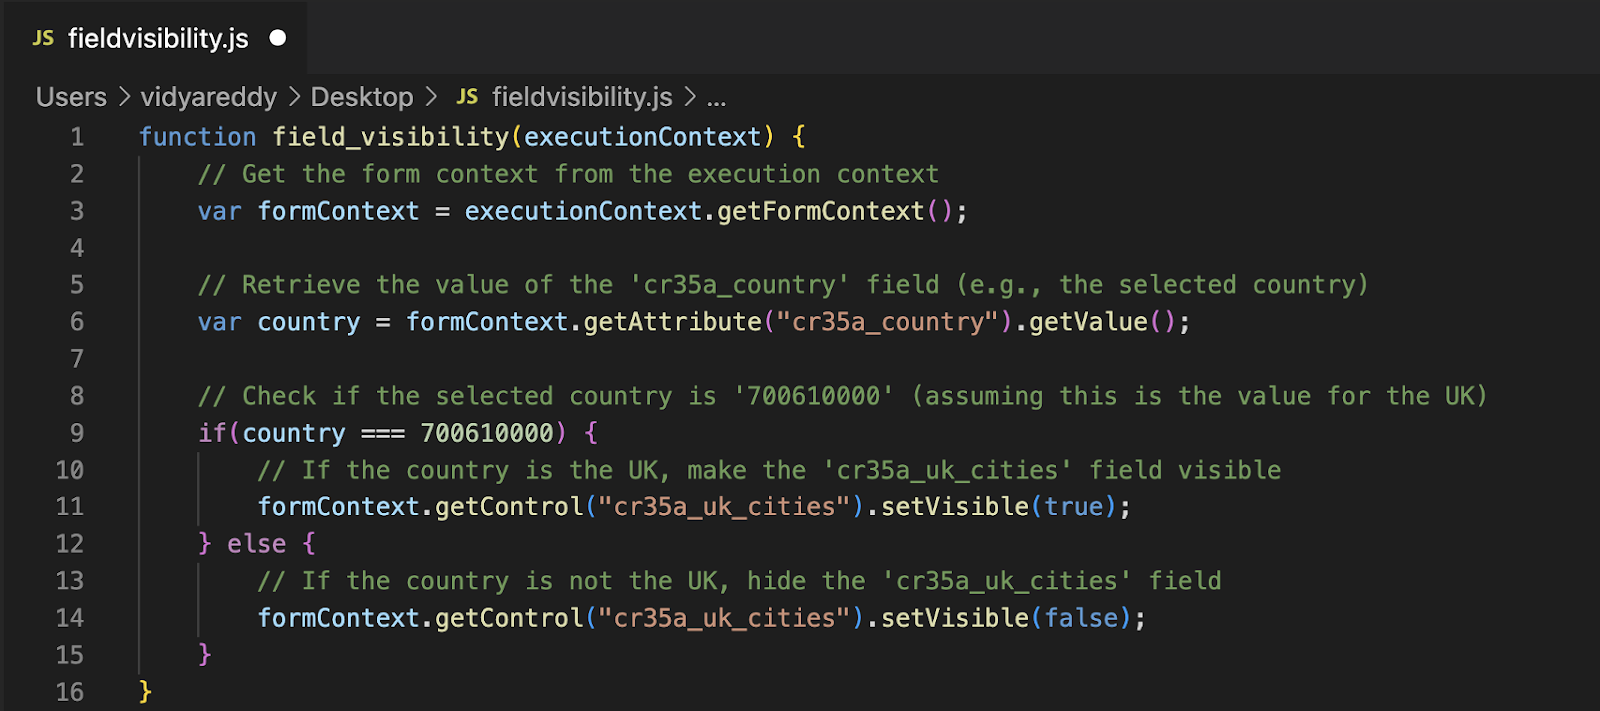
Attach a file or paste your JavaScript code in the Code field.
You can use code editors like Visual Studio Code or any online editors to write the JavaScript code before uploading.
Save and publish the web resource.


7. Link the JavaScript File to the Button
Search for the JavaScript file added earlier by its display name and select it.
Click Add to link the file to the button.
Under the Library dropdown, select the JavaScript file.
Specify the function name you want to execute when clicking the button in the Function Name field.
Ensure you select Primary Control as the parameter. This allows access to the form’s data.


Comments
Post a Comment